Tutorials/Creating Your First Mod
Welcome! This is a general tutorial recommended for those who have never used the mod editor before or anyone who needs a refresher on the process of creating a mod. This tutorial covers mod development from initial creation through to publishing on Steam.
Accessing the Mod Editor
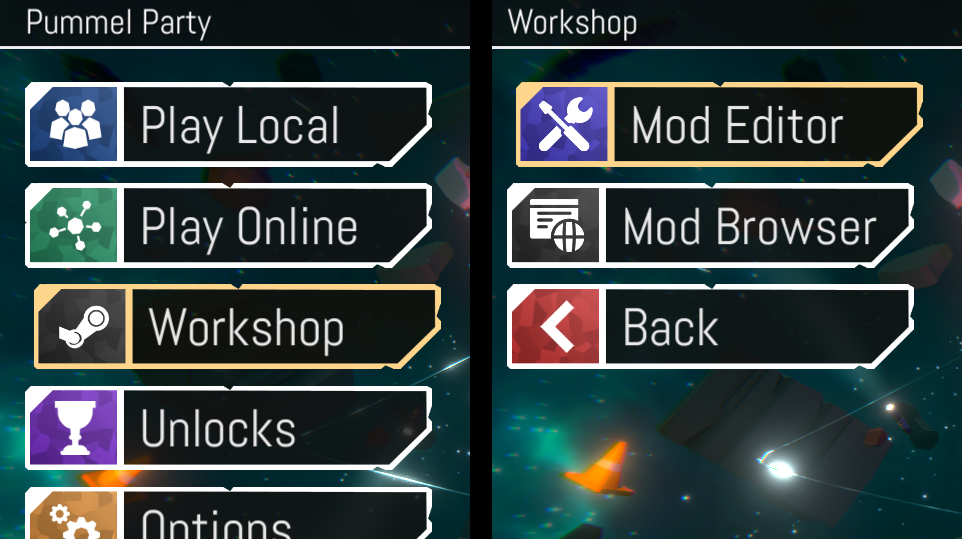
The mod editor can be accessed from the Pummel Party main menu by choosing Workshop > Mod Editor
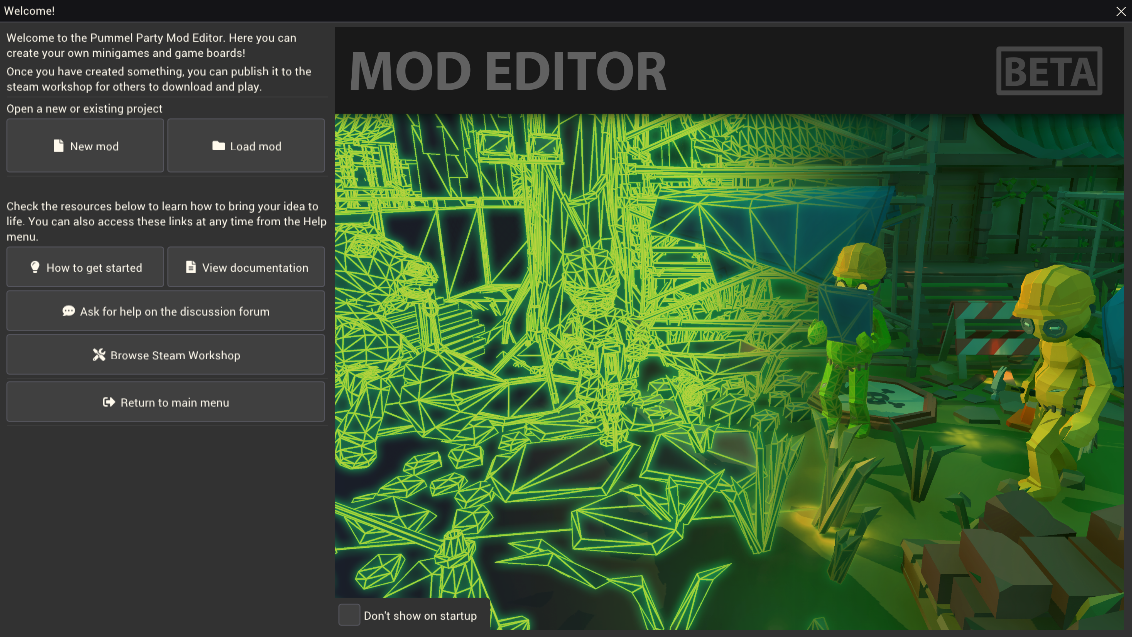
Once the mod editor loads, you'll be greeted with the welcome screen. This screen allows you to create new mods, open existing mods, access documentation and the workshop, and return to the main menu. Tip: If you don't see this window, or you've closed it, it can be opened from the toolbar using "Window > Welcome Screen"
Creating the Mod
From the welcome screen, select New Mod. This displays the New Mod window. If you've closed the welcome screen you can instead use File > New Mod to go directly to the New Mod window.
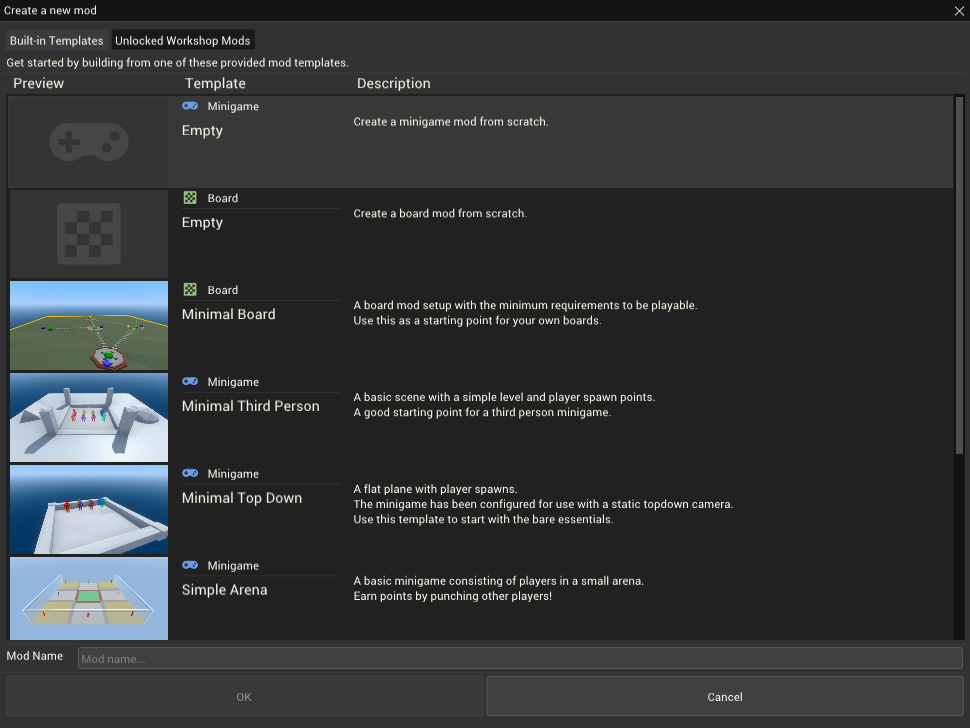
From here you can choose a mod template to use. Templates provide a preconfigured set of objects, assets and settings. Take note of the mod type of a template as this cannot be changed later. Each type of mod is played in a different way and provides access to different components and Mod Settings. When starting out it is recommended to use a template that closest matches the type of minigame or board you wish to build. Everything within the templates can be changed and removed; they are only there for convenience to help get you started with something playable.
This tutorial will create a simple minigame mod. We'll choose the Minimal Third Person template to get started. Once a template is selected, the mod must be named. This name can be changed later. Once you have entered a name, click OK to create and load the new mod.
If you don't want to use a template, you can choose either of the Empty options to create a new mod from scratch. See the tutorials for building a minigame mod and building a board mod to see the steps to create those mod types from scratch.
Developing the Mod
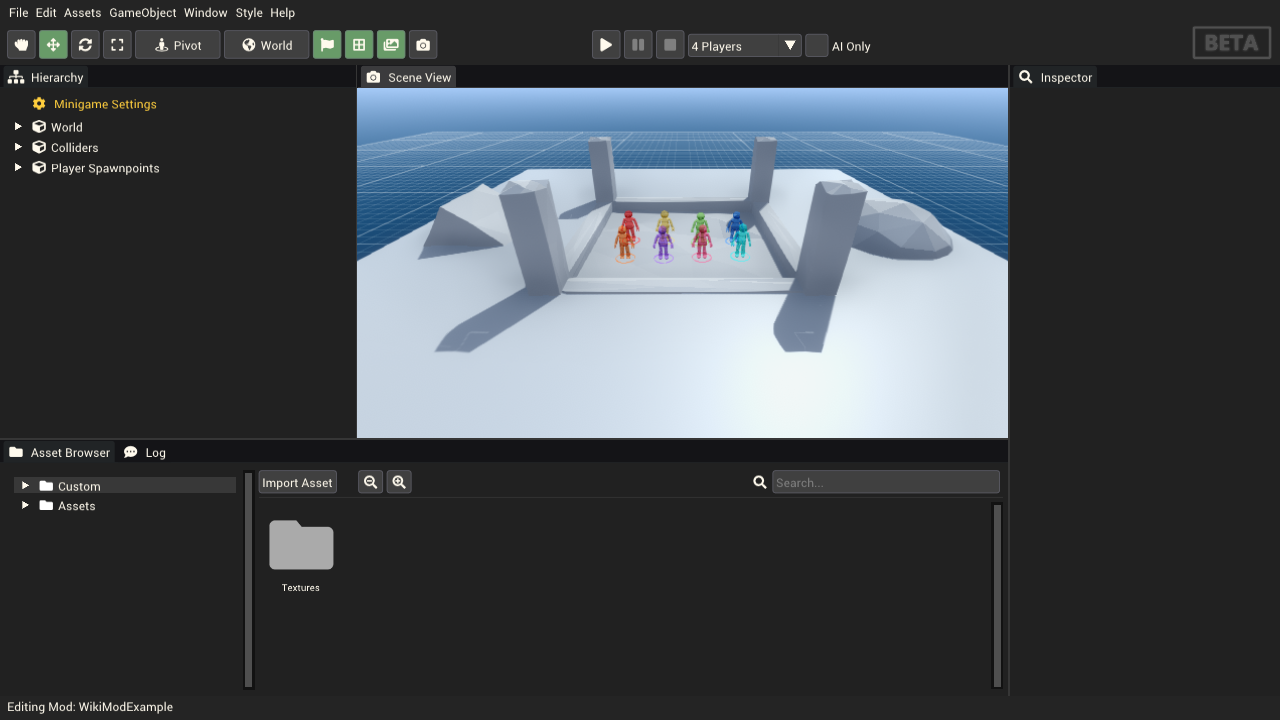
The mod has been created from the template and is ready to be edited. You will now be using the primary windows of the mod editor to create Gameobjects, with Components adding functionality to those gameobjects. It is recommended you read the Introduction to the Mod Editor to familiarize yourself with the core concepts.
To add and edit gameobjects, it is helpful to have good control over the scene view. To rotate the camera, hold right-click and move the mouse to look around. To move the camera, again hold right-click and use the WASD keys to move forward, left, back and right. Q and E allow you to move down and up. The scroll wheel will move the camera forward and backward. You can also use the arrow keys to move at any time, without right-click being held. Finally, you can hold the middle-mouse button and drag the mouse to pan the view.
Holding SHIFT will move the camera faster.
You can focus the camera on an object by selecting it (either in the scene view or the hierarchy window) and pressing F on the keyboard.
Adding Gameobjects
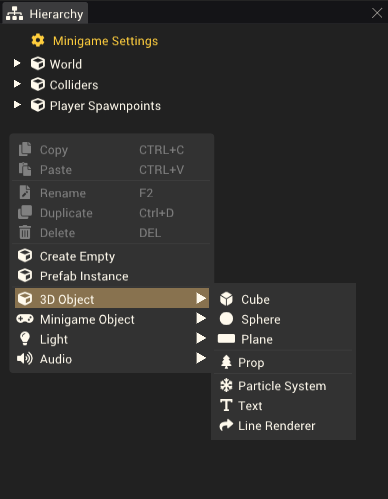
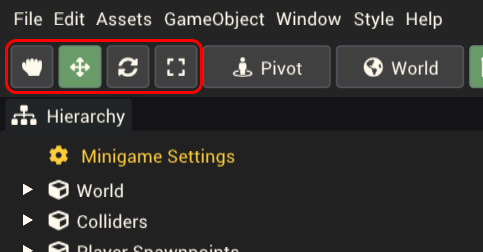
Adding gameobjects is done from the Hierarchy Window. Right-click the hierarchy and choose one of the gameobject options to add a new gameobject. You can also use the Gameobject tab in the toolbar. We'll place some cubes to act as blocks for players to jump on or hide behind. Right-click the hierarchy and choose 3D Object > Cube to place a cube. It will be put at the origin of the world with an x,y,z position of 0,0,0. Select it in the scene view by left-clicking on it. You can use the gizmos that appear to move, rotate and scale the selected gameobject. Use the buttons in the top left of the toolbar to change which gizmo is available.
With the cube selected, enter transform mode and drag the arrow gizmos in the scene view to position the cube in the scene.
Adding Components
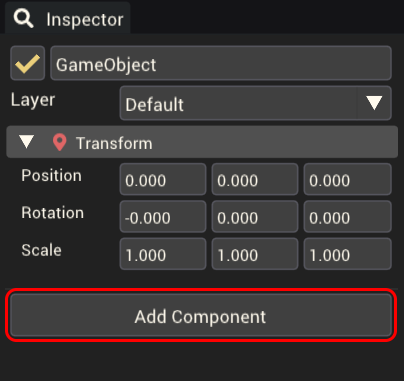
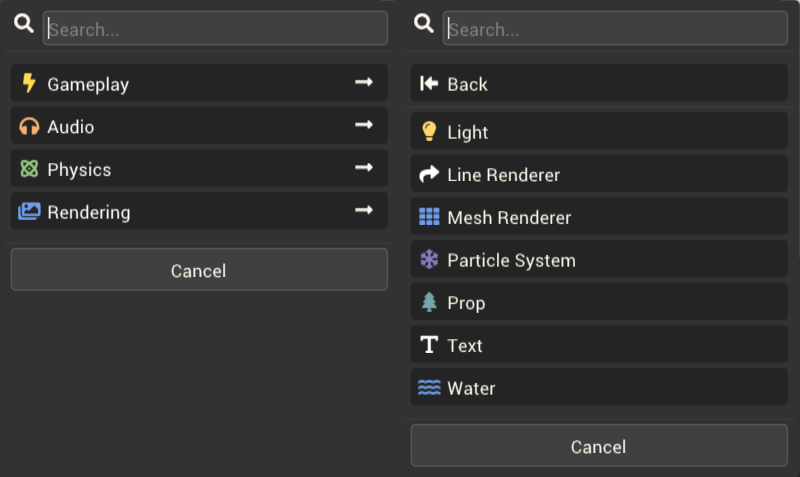
Components can be added to gameobject. Start by selecting a gameobject using either the scene view or the hierarchy window. With a gameobject selected use the inspector window and click Add Component. This displays a grouped list of components that can be added. If a component cannot be added, it will appear disabled in this list; you can hover over the option to find out why it is disabled.
Adjusting the Mod Settings
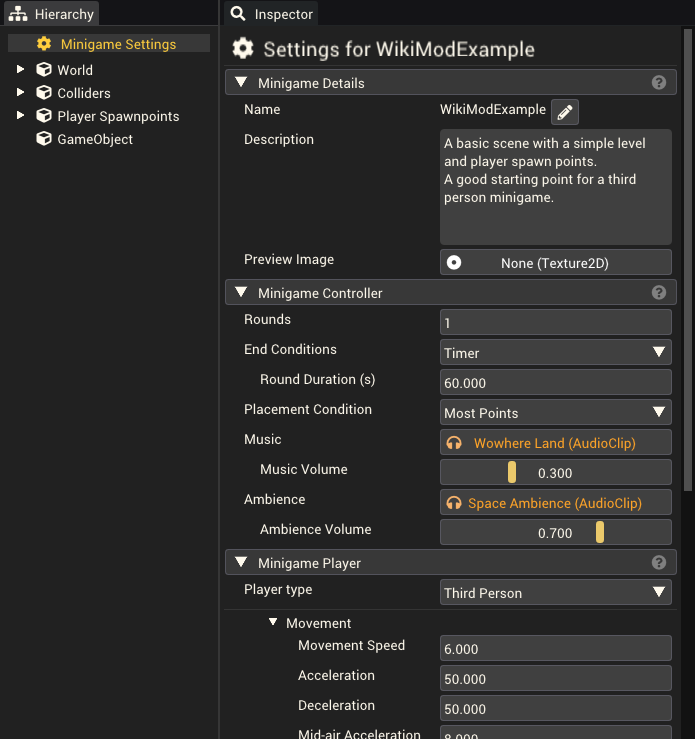
A variety of settings can be adjusted to change many aspects of the mod including what the rules are, how the mod plays, what background music is used and even how the lighting should look. You can access the mod settings using the special object at the top of the hierarchy. The mod settings will be displayed in the inspector while this object is selected.
Play-testing the mod
You can test the mod by clicking the play button [▶] at the center-top of the mod editor. While the mod is being tested, it cannot be edited. To stop testing the mod, click the stop button [⬛]. If your cursor is locked, hit escape to pause the test and free your cursor. While testing a mod, you can use the pause button [⏸] to pause the game.
Publishing your mod
Once you have finished developing your mod you can publish it to the Steam Workshop. With your mod on the workshop, other players can subscribe to it and play it. You can publish a mod as long as it has no validation errors when using the Mod Validator.
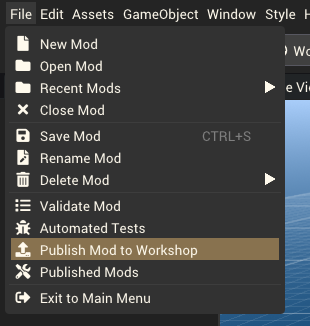
From the toolbar select File > Publish To Workshop to begin the publishing process.
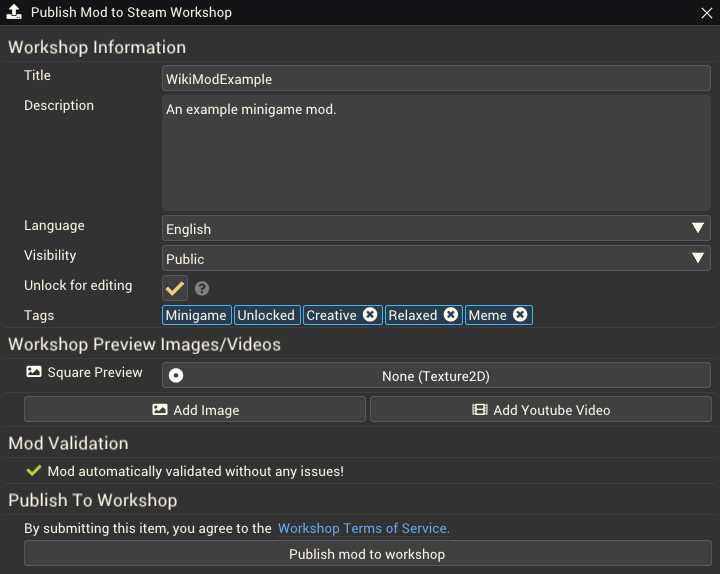
This displays the publish window. Information entered here will be displayed on the mod's steam workshop page. See Publishing to the Steam Workshop for a detailed explanation of the different options. Clicking "Publish" will upload your mod to the Steam Workshop and open the steam overlay to display the workshop page.
Congratulations, you have learned how to create, develop and publish a pummel party mod!
Sharing your mod with others
Other players need to subscribe to your mod to play it. You can send them a link to the workshop page of the mod, or they can find and subscribe to the mod through the Mod Browser in-game.
If you want to play your mod with friends, you can invite them to a lobby where the host has the mod subscribed and enabled. This will automatically download the mod for all other players that aren't already subscribed to the mod.
