Tutorials/Building A Board Mod
This tutorial will cover what is required to build a Board Mod. It will start from the empty template and go through everything required to make the mod playable. This tutorial assumes a basic understanding of the mod editor, including how to access and create a new mod.
Background information
Minimum requirements
Boards are required to contain the following:
- A single Start space
- Every board space must have at least one outward connection to another board space.
- Every board space must be connected (e.g. can't have two disconnected loops)
- Every board space should be reachable through rolling the dice (so no board spaces that are only accessible through Move To Space Actions or similar)
They should optionally also have:
- At least one graveyard space
- Solid props in the WorldGround layer beneath all board spaces and paths between board spaces.
These last two points can be ignored and the mod will still be playable. Things might behave unexpectedly, however, like players not respawning correctly or walking between spaces without following the ground.
Adding solid ground
The solid ground can be built from Prop Components with collision enabled. Gameobjects being used as a floor in a board mod must be assigned to the WorldGround layer.
Adding board spaces
Create a board space from the Hierarchy Window by right-clicking and choosing Board Object > Board Space This creates a board space set to give keys.
You can move this space somewhere slightly above the solid ground and click the "Align to ground" button in the inspector to have it automatically positioned and rotated so that it is flat on the ground.
To add more board spaces, you can either repeat this process, duplicate and move the existing space, or use the blue connection arrows to automatically (and quickly) build a path of board nodes. Read on to learn about this last method.
Connecting board nodes
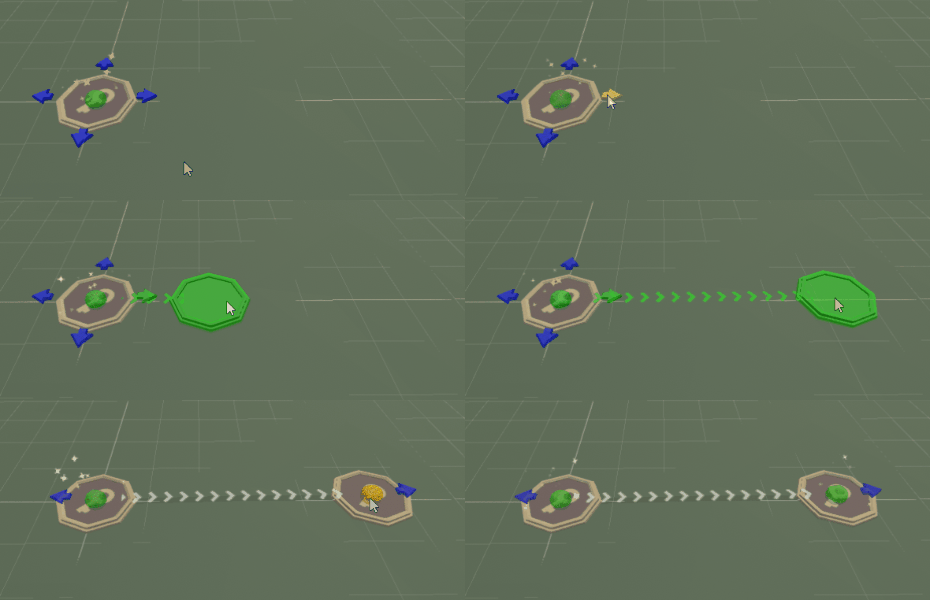
Each board node has a blue arrow somewhere around its edge (or four if it has no connections yet). Clicking these arrows will begin the creation of a board node connection. A connection is a directed path from one space to another. This is the path players will follow from space to space. A board space can have multiple incoming and outgoing connections.
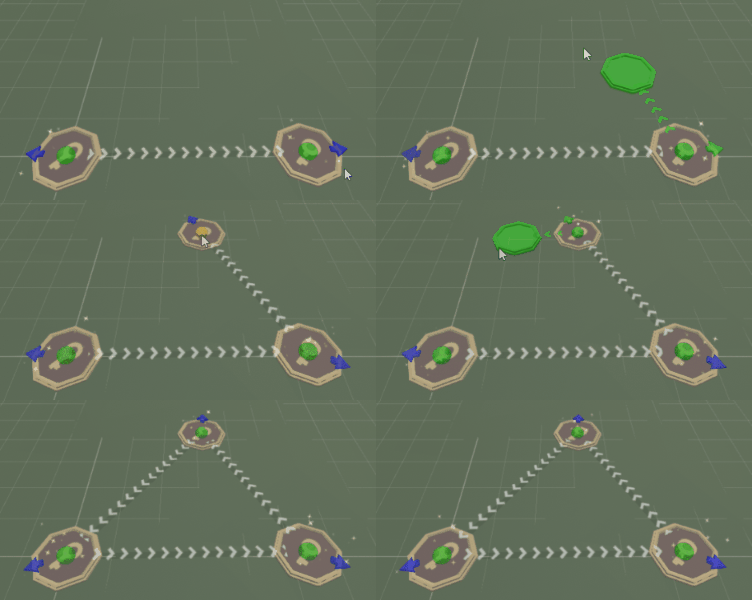
To connect two board spaces, click the arrow on one board node. Notice a path is drawn between the space and the cursor. Now click another board node and the path will connect to the space you clicked. If you click somewhere that isn't a space, a new board space will be created there and connected. Using this, you can quickly build paths of board spaces without needing to manually add each space.
If you want to stop creating a connection, you can right-click to cancel.
To delete a connection, select it in the Scene View so it is highlighted, then press the Delete key on your keyboard.
You can change the connection type by selecting the board space where the connection originates. In the Inspector Window expand the "Outgoing Connections" foldout to view the connection type of all outgoing connections. You can choose between Walking and Teleport. Walking is the default where players walk between the spaces. Teleport will instead teleport the player instantly from one board space to another.
Board Settings
Board mods have a number of unique settings that can be adjusted. These include Custom Board Spaces, Board size and Camera Settings.
- Custom spaces allow you to provide a list of prefabs to be used as board space types. You can choose the Custom space type on any board space in the scene to choose on of these custom board spaces.
- The board size is automatically calculated but can be manually set if needed. It describes how much area the board takes up, stopping items from being used outside this area.
- The camera settings allow you to define how the camera should view the players. It can be tilted up/down, moved closer/further, given a different field of view, or even changed to Orthographic perspective mode, making everything look flat.
Tutorial
We'll create a simple board that is playable and has split paths and different types of connections. The mod template being used for this tutorial is the "Empty" board mod template. This template has default values for all mod settings and has no gameobjects in the scene. The mod is unplayable in this initial state as there are no board spaces.
Creating a basic level
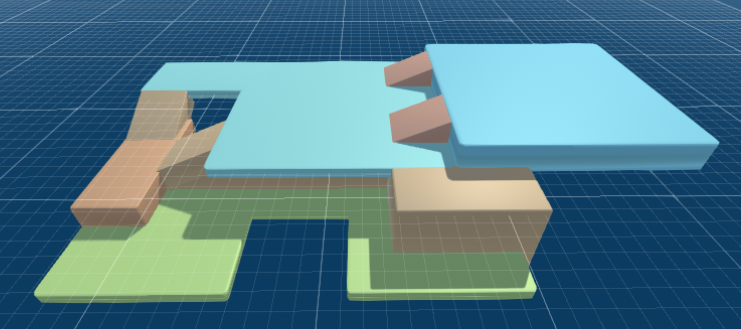
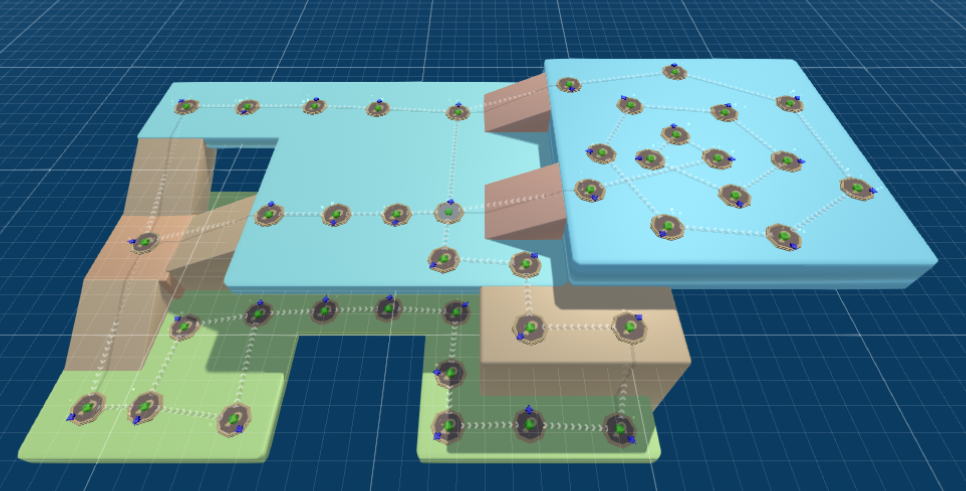
Start by creating some solid ground to create a rough base of how the board will look. Depending on how complex the board you'd like to create is, it may be beneficial to use basic shapes to get an idea of the scale of the board first, before spending time adding the finer details. Don't forget to make the ground solid, and part of the "WorldGround" layer. Here is a basic blocked-out level.
Adding the board spaces
First, add a board space. Since this is the first board space, I'll change its Type to "Start". This is where players will begin at the start of a game. You can only have one start space for a board mod, any more or fewer will give an error in the Mod Validator.
Now proceed to add the rest of the board spaces around the level. The easiest way is to start a new connection and click where you'd like the new node.
Adding teleport connections
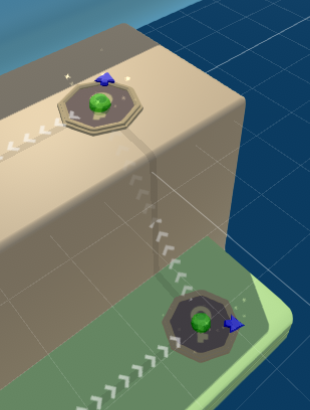
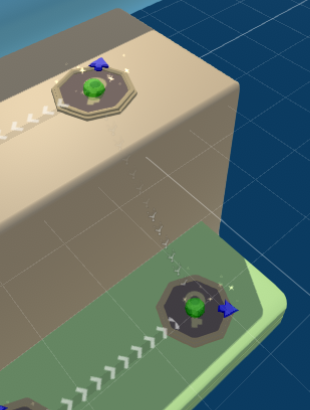
Now we can make some of the connections into teleport connections. I'll update the connection in the bottom right of the level to teleport players up the wall. You can see the connection arrow changes to show a different icon and the dark line between the spaces disappears. These indicate that it's a teleport connection.
I'll also make the players teleport out of the spiral on the right side of the level.
Increasing board space variety
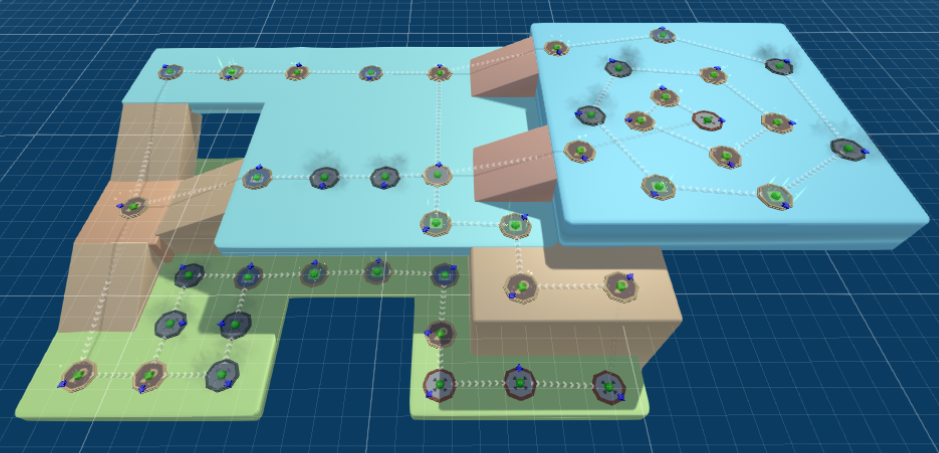
This is a good start however it's a bit boring with the spaces all being key spaces. We should add some variety by using other space types. The different types should ideally be spread out across the board. It can be fun to combine split paths with different types of spaces to make players choose which they'd rather land on. here is how this board looks after changing the board spaces to different types. Make sure to keep some key spaces if you still want players to collect keys from the board, otherwise, they need to rely on minigame placements and items to collect keys.
Adding a graveyard
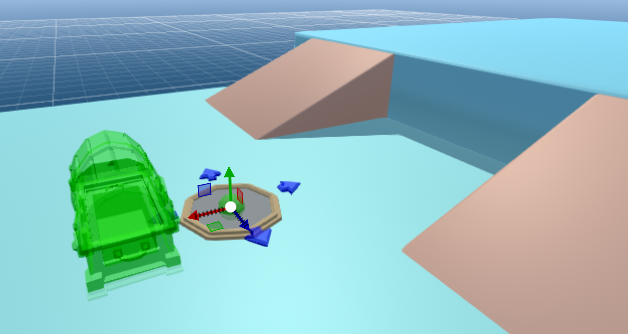
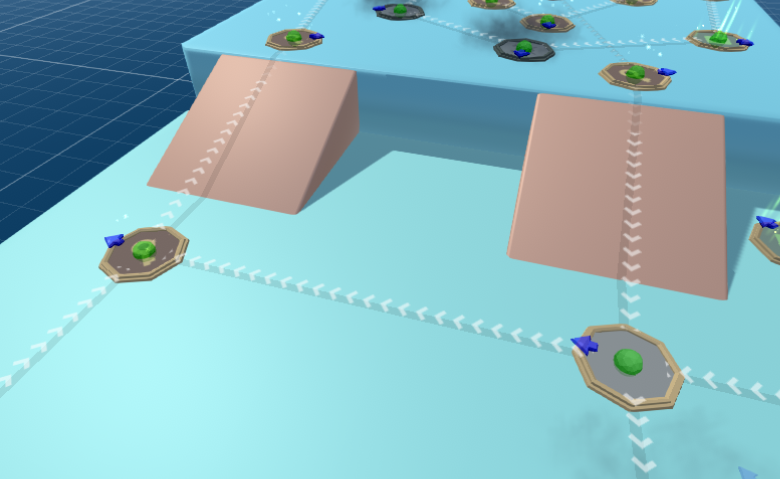
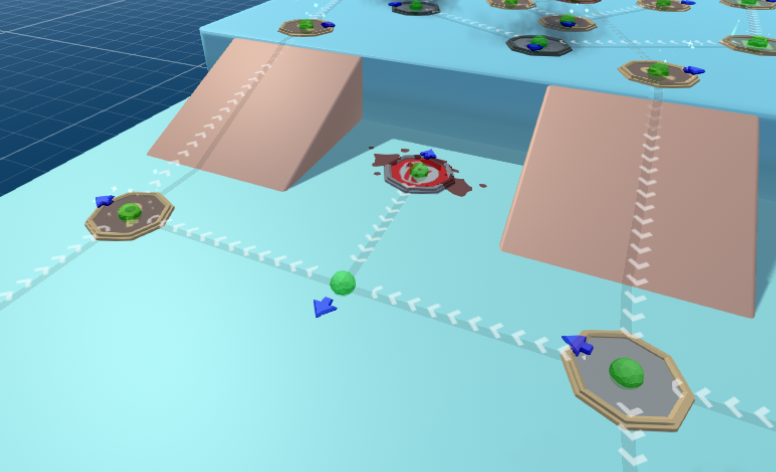
Now we should add a graveyard for players to respawn at. I'll insert one just after the start space between the two ramps.
Delete the connection between the start space and the next space, then add a new board space for the graveyard. Add another space after the graveyard, this will be a pathing space. Connect the start-up to the pathing space and the pathing space up to the node beside it. Now players will continue to move from the start space to the adjacent board node as they did previously as the player cannot stop on a pathing space, and the pathing space doesn't cost a move to walk to. If someone respawns at the graveyard they can walk out and back into the board.
Playtesting
Hit the play button at the top of the mod editor to begin playtesting the board. While playtesting, minigames will be skipped allowing you to navigate the board faster.
Adding details/theming
Once you're happy with how the board plays, you should aim to make it visually interesting. Pick a theme and add props to match the theme. A good way to them a board is to choose a high-level theme and then some sub-themes. Try to make the entire board fit the main theme, and choose specific locations around the board to apply the sub-theme.
An example of this is the Pirate Paradise board. The entire map is pirate themed, while one part of the map focuses on a boardwalk, another on the coastal town, and the bottom left corner is a sandy hideaway with a shipwreck and a treasure chest hidden in the cliffs. Having these distinct areas on the map helps players understand where they are and makes the map more memorable.
Download the mod
You can subscribe to the mod created through this tutorial from the workshop. It is unlocked so you can use it as a base for creating your own mods.


